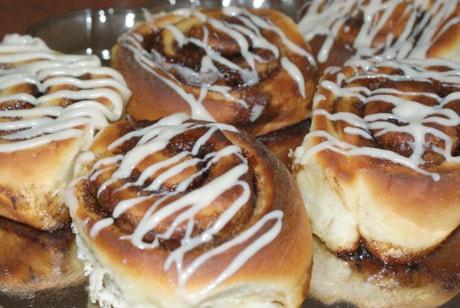
There’s something rich and sinful about homemade cinnamon buns. Rich, buttery, pull-apart not-quite-bread, not-quite-pastry buns wrapped around a layer of dark brown sugar, and cinnamon. Cooked to a golden brown, the crisp edges are then softened with a drizzle of icing that oozes and seeps between your fingers to excite your taste buds and soothe your soul.
Cinnamon buns are my daughter’s favourite treat. So, I have laboured over the process of the kneading, rising, and shaping to create the perfect cinnamon buns for her.
Though I must confess, on many occasions I have utilized the 20-minute recipe to satisfy her last minute request. This usually involved taking out her favourite brand container out of fridge, popping it open, placing each of the eight perfectly round circles on the cookie sheet.
These were then baked and glazed with premade frosting. While this recipe may have satisfied her sweet craving, I never felt any gratification in preparing them.
Why is that?
There really is something different about homemade cinnamon buns versus the store bought variety. I am not sure if it is the satisfaction from creating your own fresh tray of buns or the end result. Maybe it’s because when you create your own, the smell is subtle, intriguing, and mouth watering. And the taste and texture are light and well balanced, with just the right sweetness and stickiness.
Making homemade buns from scratch is definitely a weekend endeavour because of the long rising intermissions.
If you want a morning treat begin making them the night before and let them rise in the fridge overnight.
Serve with a strong cup of coffee or tea, and you’ve got a decadent way to start your Sunday morning.
Making perfect cinnamon buns
• Prepare the yeast dough. Once the dough has risen once, turn it out onto a lightly floured surface. Flatten the dough with the palms of your hands and gently stretch roll it into a rectangle.
• Use a rolling pin to roll the dough out into a larger rectangle, approximately 12 inches wide by 20 inches long. Spread the softened butter over the surface of the dough, but leave a 1-inch strip along the long edge of the rectangle furthest away from you completely dry.
• Sprinkle cinnamon-sugar over the butter, spreading the mixture evenly across the whole sheet of dough. Leave the 1-inch border free of sugar.
• Start at the left-hand corner of the edge closest to you. Working from left to right, tug the lip of the dough up and over the filling, keeping it tight. Roll up the dough, tightening the log as you go. When you reach the far edge of the dough, moisten the bare edges with water and pinch to seal the seam.
• You can cut the buns using a serrated knife, or pastry cutter, but my preference is the un-waxed dental floss method. This probably is the most ingenious method that prevents the squishing that can happen with a knife. To easily cut the dough with the dental floss, slide it under the log dough, cross the dental floss at the top and pull.
• Place the cut rolls on a greased or parchment-lined pan or cookie sheet. To make individual rolls, space them two to three inches apart on a cookie sheet. Cover the rolls with a damp cloth and let them rise until they nearly double in size, about 45 minutes to an hour.
The rolls can also be covered with plastic wrap and placed in the refrigerator. The next morning, let the rolls rise at room temperature until doubled, then bake as directed. The dough can also be frozen for two weeks to one month. Thaw, still wrapped, at room temperature. Proof and bake as directed.
• To test for doneness use a paring knife or fork to pull up the center-most roll; if the dough is still sticky and raw-looking, return the pan to the oven for about ten more minutes. The rolls should be golden to dark brown on top, and fully baked in the center of the coil.
• Cool the pan on a rack about 10 to 15 minutes before glazing.
Cinnamon Buns
1 cup warm milk (110 degrees F/45 degrees C)
3 eggs, room temperature
1/3 cup margarine, melted
4 1/2 cups flour
1 teaspoon salt
1/2 cup white sugar
2 1/2 teaspoons quick rise yeast
1 cup brown sugar, packed
2 1/2 tablespoons ground cinnamon
1/3 cup butter, softened
1 (3 ounce) package cream cheese, softened
1/4 cup butter, softened
1 1/2 cups confectioners’ sugar
1/2 teaspoon vanilla extract
1/8 teaspoon salt
Pour warm milk into your mixer bowl. Add and mix together sugar, salt, margarine, eggs and yeast. Using a dough hook, slowly add flour to the bowl. Once the ball has formed, let dough sit for 2 hours.
After the dough has doubled in size turn it out onto a lightly floured surface, cover and let rest for 10 minutes. In a small bowl, combine brown sugar and cinnamon. Make the buns as mentioned above.
Preheat oven to 400 degrees F (200 degrees C). Bake rolls until golden brown, about 15 minutes. While rolls are baking, beat together cream cheese, 1/4 cup butter, confectioners’ sugar, vanilla extract and salt. Spread frosting on warm rolls before serving.
Madhu Badoni is a Red Deer-based freelance food writer. She can be reached at madhubadoni@gmail.com