The flavour and texture of homemade ice cream is incomparable: it’s rich, creamy, and decadently sweet and, best of all, it’s whatever flavor you want, limited only to your imagination.
I love perusing through food magazines and the internet for recipes but sometimes it can be a frustrating expedition. There is hundreds of tempting ice cream recipes out there and they are all enticing and inviting but inevitably the final instruction “freeze in an ice cream machine according to the manufacturer’s directions” has me grinding my teeth. It’s almost telling the reader, “No ice cream maker, well, no homemade ice cream for you.”
I am sure that statement has deterred many from making ice cream in their kitchen, but it really shouldn’t.
I’m going to let you in on a little secret: ice cream can be made at home without any fancy appliance! Thousands of years before refrigeration was even dreamed of and when electricity hadn’t been discovered, people still enjoyed ice cream!
Much like you can make homemade bread without a bread maker you can also create delicious ice cream without an ice cream maker.
The non-believers are thinking, “Yes, but ice cream turns out rock hard and gritty with ice.”
Not at all. The results are every bit as creamy and smooth as any ice cream ever made in an appliance!
Don’t get me wrong, I have nothing against ice cream makers. I’ve used them before and they do work wonderfully because all the hard work is done for you. For me, even though ice cream makers are cheap to purchase, they do have a couple of not so pleasing attributes.
First, it’s the noise while the ice cream is being made — it is like as if the machine is groaning and moaning. Second, because an ice cream machine is used seasonally and intermittently, it does require prime cupboard space. Where do you shove it when you don’t need to use it?
Making ice cream the old-fashion way requires no special equipment. All you need is a freezer, a metal or ceramic bowl, and something to stir it with — a whisk or mixer is best.
The difficult part of making ice cream in your kitchen is trying to decide what flavours and what recipes to choose! Vanilla, strawberry, mango, rocky road, praline, hot fudge or cookies and cream are some of my favourites, but there are countless recipes and most can be made without a handy dandy machine.
If you’re new to the world of making ice cream, I recommend starting with a recipe that is custard or whipped cream based for the smoothest texture possible. Recipes using heavy and whipped creams give richer and smoother, specialty ice cream shop type ice creams. Another secret to “icy free” ice cream is to incorporate plenty of air into your mix.
If using the custard-based recipe, make sure the custard has thickened during the cooking process and let the ice cream mix age before proceeding to the freezing step. Minimum time for this is a couple of hours but overnight is the best. This step improves the whipping qualities of the mix and the body and texture of the ice cream. After aging the mixture, the ice cream is then ready for the freezing process.
Ice cream texture is affected by stirring. If you just throw ice cream mix into the freezer, you’ll have a solid block of icy dairy — not very scoop-able or fun to eat. You have to prevent large ice crystals from forming while freezing the mix. There are many ways to do this, but they are variations on one simple concept: mix or agitate the ice cream while it is being frozen.
Transfer the ice cream mixture to a freezer-safe bowl or container if not already in an appropriate one. Cover tightly with plastic wrap, foil or an airtight cover. Place the container in the freezer and allow the mixture to freeze for one hour. Remove from the freezer and beat to break up ice crystals that are beginning to form. Cover and place back in the freezer. Freeze for another hour and then remove from the freezer and beat again with the hand mixer. The ice cream should be thick but still too soft to scoop. If it is not thick enough, return it to the freezer for additional freezing time.
When it is at the soft ice cream stage, you can then mix in add ins like cookie chunks, chocolate, candies or fruit. During this step, do not beat with the hand mixer but gently fold in. Beating would break the chunks into crumbs and tiny pieces.
The final step is hardening. Simply pour the soft ice cream into a plastic airtight freezer container. Pack the ice cream in the container and be sure to leave at least a half-inch head space for expansion. Cover and allow the ice cream to freeze until firm.
After the ice cream has hardened sufficiently, take the ice cream container out of the freezer, scoop ice cream into bowls or cones.
Here are three of my top ice cream recipes I like to indulge in
Vanilla ice cream
1 cup white sugar
1 cup half and half cream
2 eggs
2 cups whipping cream
1 1/2 teaspoons vanilla extract
In medium saucepan over low heat, stir together sugar, milk and eggs. Cook, stirring continuously, until mixture thickens enough to coat the back of a metal spoon, 10 to 20 minutes. Remove from heat and let cool.
In a medium bowl, whip cream with electric mixer until soft peaks form. Beat in vanilla and lemon juice, and whip until stiff peaks form. Fold whipped cream into cooled custard. Chill in refrigerator 8 hours or overnight. Stir chilled mixture to recombine, and freeze in ice cream maker according to manufacturer’s instructions.
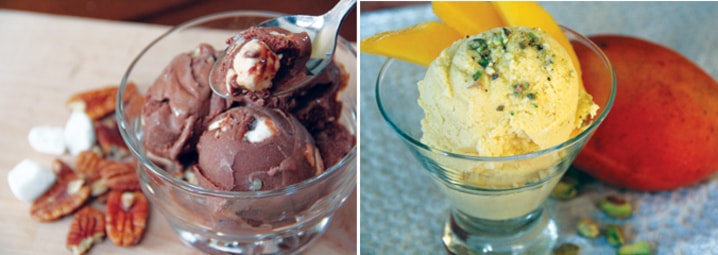
Rocky Road Ice Cream
1 (14 ounce) can sweetened condensed milk
1/2 cup unsweetened cocoa powder
2 cups whipping cream
1 cup half and half cream
1 tablespoon vanilla extract
1/2 cup chopped pecans
1 cup miniature marshmallows
In a medium saucepan over low heat, cook and stir condensed milk and cocoa until smooth and slightly thickened, 5 minutes. Remove from heat and allow to cool slightly. Stir in whipping cream, half and half cream, and vanilla. Refrigerate until cold. Freeze and mix every hour until ice cream is soft. Then mix in pecans and marshmallows. Allow to freeze until frozen solid.
Cardamom Spiced Mango Ice Cream
(adapted from Canadian Living Magazine)
3 mangos
2 cups half-and-half cream
3 cardamom pods , cracked
1 /2 tsp vanilla
5 egg yolks
1/2cup cup sugar
1cup whipping cream
Crushed pistachio, garnishing
In saucepan, heat half-and-half with cardamom pods over medium-high heat just until bubbles form around edge. Remove from heat; let steep for 5 minutes. Strain into bowl; stir in vanilla.
In separate bowl, whisk eggs with sugar for 1 minute, gradually whisk in cream mixture. Return to pan; cook over low heat, stirring constantly, for about 12 minutes or until thick enough to coat back of wooden spoon. Immediately strain through fine sieve into bowl. Stir in whipping cream. Let cool to room temperature. Place waxed paper directly on surface; refrigerate for at least 2 hours until chilled. (Make-ahead: Cover and refrigerate for up to 24 hours.)
Peel, pit and coarsely chop mangoes. In food processor, pure mangoes with sugar until smooth. Press through sieve; fold into chilled custard.
Freeze and mix until soft form. Then freeze until frozen.
Madhu Badoni is a Red Deer-based freelance food writer. She can be reached at madhubadoni@gmail.com. Watch for Madhu’s Masala-Mix blog on www.reddeeradvocate.com.